Control DMX Lighting fixtures independently
To control the parameters of an individual light, you must select the correct lighting mode and assign its DMX starting address. You’ll be able to control it once they’re properly configured. For this example, we will use a 3-channel setup to control two DMX bar can lights independently using an E4 controller. Once configured, practice controlling each individual channel. Try placing the lights so that they mix, allowing you to control their blend and create cool effects.
Connection guide.
In this guide, we’ll show you how to get up and running with DMX lighting. You’ll learn what DMX is and how to configure your lighting rig. Follow the sections below to get started.
- Connect the bar, power suppy and DMX controller, a cat connect DMX controller and PC
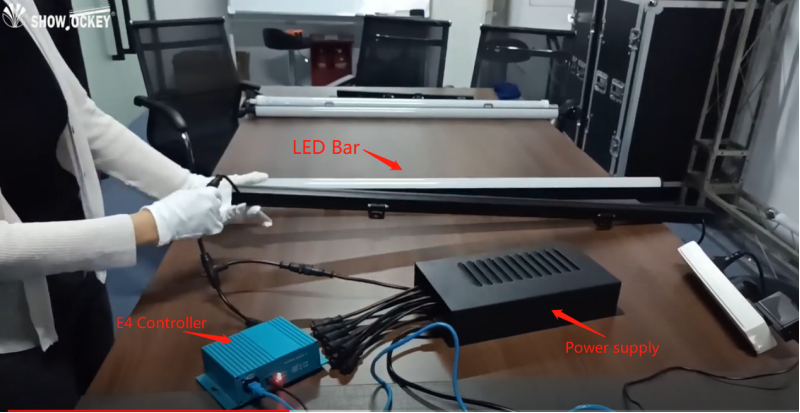
Single connection, directly connect the controller to the computer through the network cable, at this time, the computer does not WIFI connected to the network to avoid IP conflicts
2.Set up the IP address and then confirm it
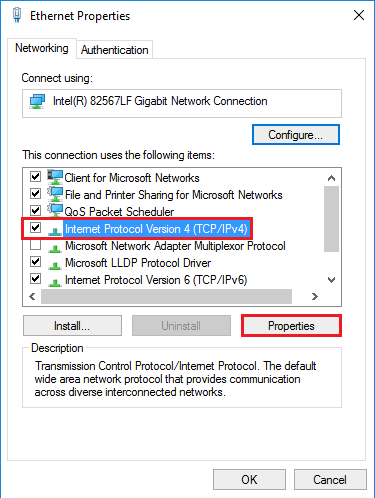
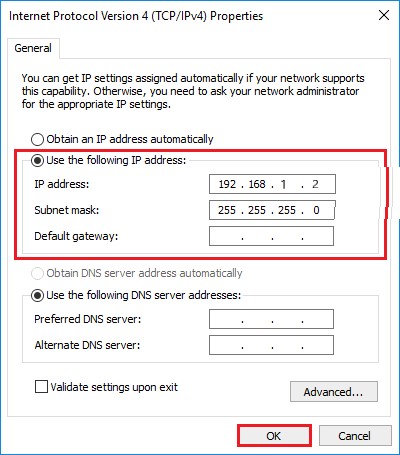
Open Network Settings, find Ethernet, Change Adapter Options, find Ethernet, open Ethernet Status, Ethernet Properties, select Internet Protocol Version 4 (TCP/PVP4), Internet Protocol Version 4 (TCP/PVP4) Properties, use the IP address below. Enter the IP number of the same network segment
1. showjockey controller factory default IP 192.168.1.200
2. Set the IP to the computer, controller, such as, the computer IP 192.168.1.2
Computer, controller IP must be 192.168.1.(1-200) or 192.168.1.(202-255) in the choice. The first 3 IP is the same, indicating the same network segment. IP is not the same mainly refers to the last value.
3. Open a browser, input the IP, turn to the page Showjockey Artnet Webserver: Home
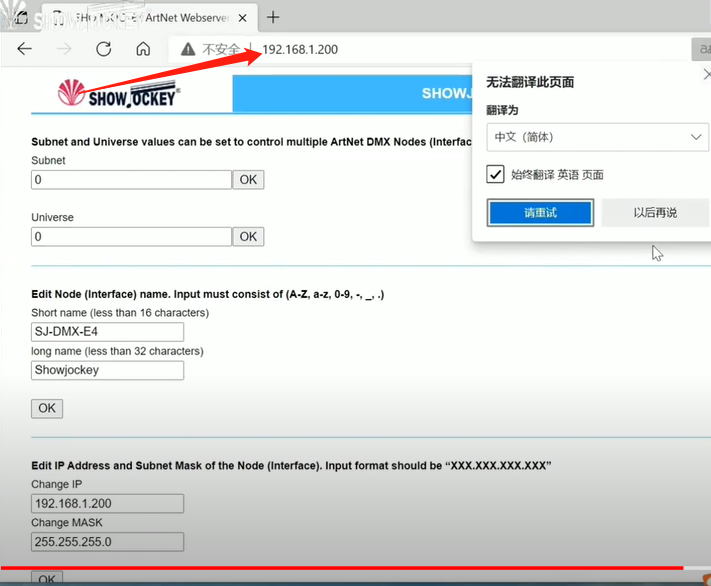
Here you can change the IP address, the name the device has on the network and things like the universe and subnet offset. Once we set up the IP correctly and power cycled the little rascal, this device was also working correctly.
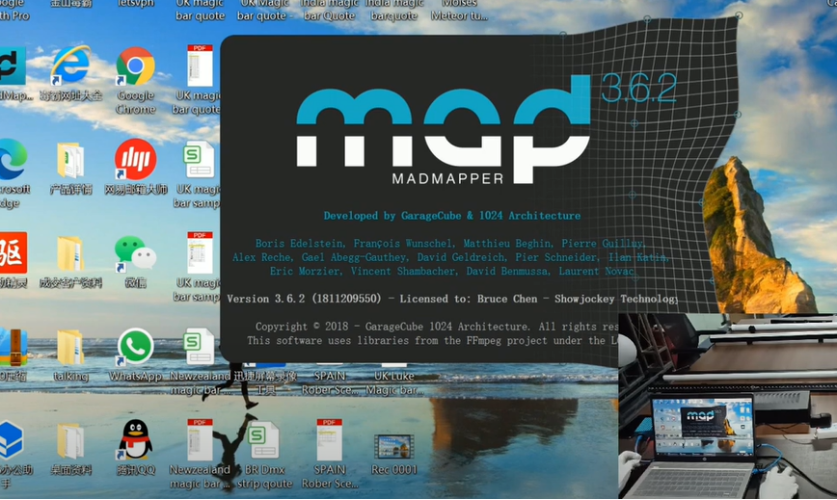
4. Open the Madmapper Software
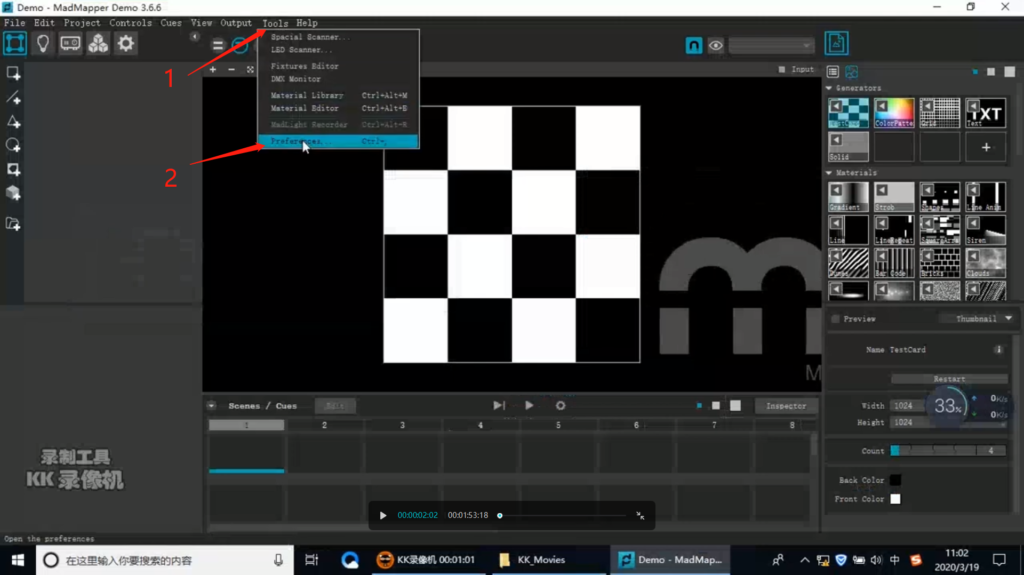
5 Find the tools and click the DMX Output,add showjockey’s artnet controller
Select “ArtNet” in the DMX Output Device column.
In the Interface column, select “Computer IP” (this is the IP you set for your computer earlier), and automatically
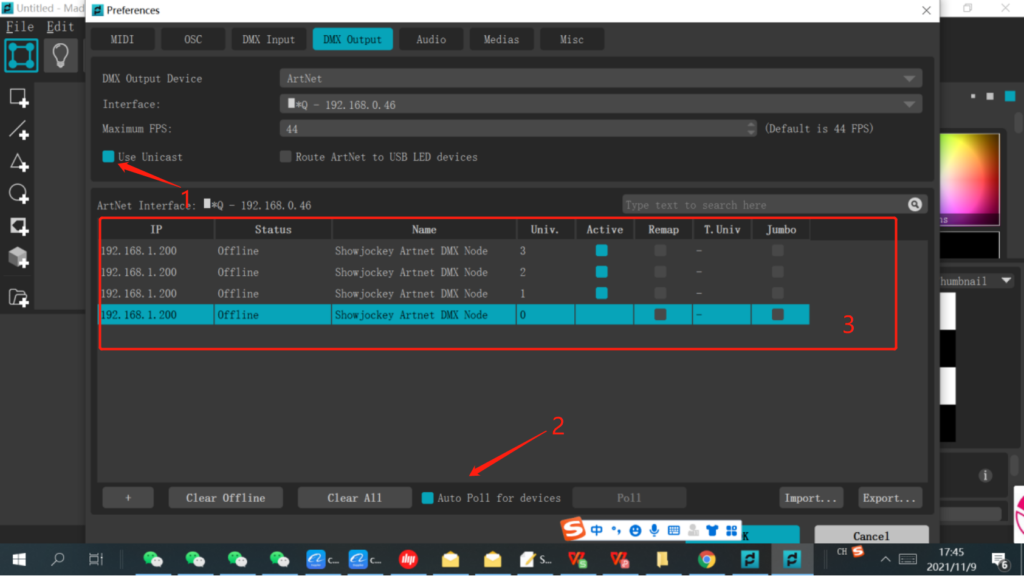
At this point, click “Use Unicast”, “Auto Poll for devices” “ArtNet Interface …. ” The information of the controller will appear below the column, indicating that the controller is successfully connected.
Terminology:
Node: A device that translates DMX512 to or from Art-Net is referred to as a Node.
Sub-Net: A group of 4 consecutive universes is referred to as a sub-net. (Not to be confused with the subnet mask).
Universe: A single DMX512 frame of 512 channels is referred to as a Universe. here on arnet configuration, MadMapper subnet is 0 and the universe 0 it means that the first output of controller. For the universe 0 : output 1 universe, for the universe 1: 2 output universe, for the universe 2 : output 3 universe, etc …
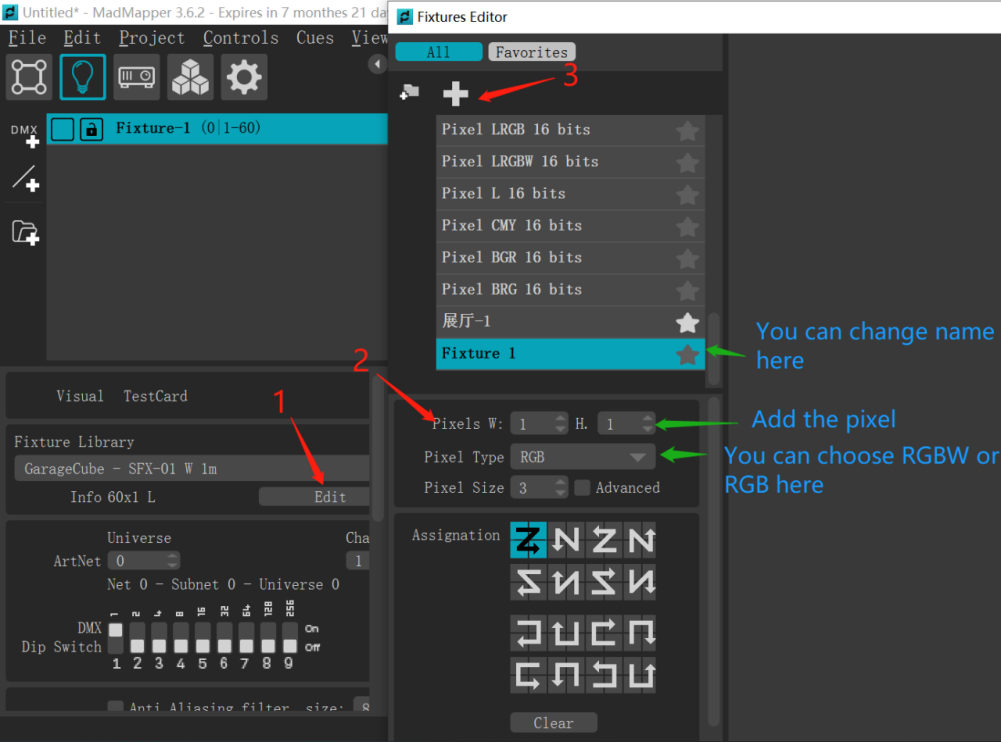
6. Add the number of DMX fixture
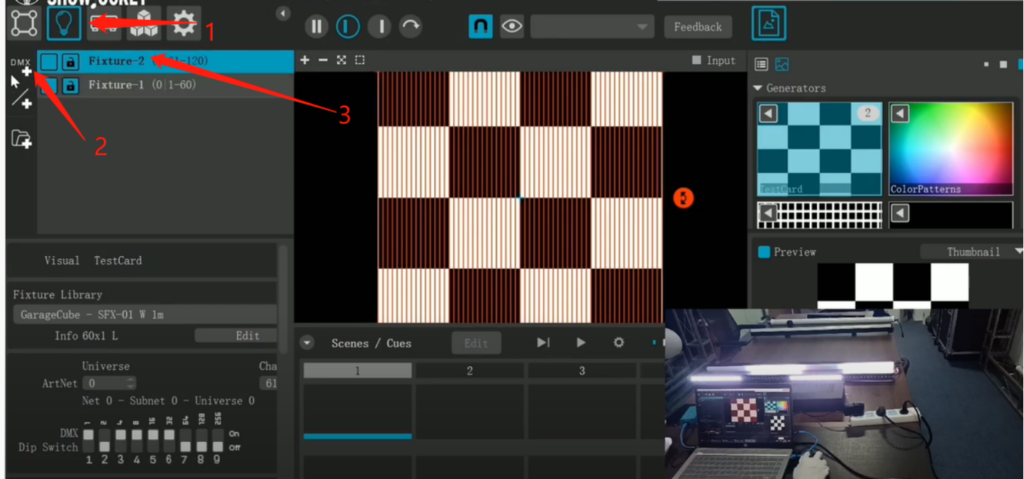
Create a new line definition, the line definition is designed according to the actual fixture pixels. 0″ means “Port 1 and DMX Out 1”; and so on, “10” means “Port 11 and DMX Out 11”. 11″ “1-60” means “60 pixel points”
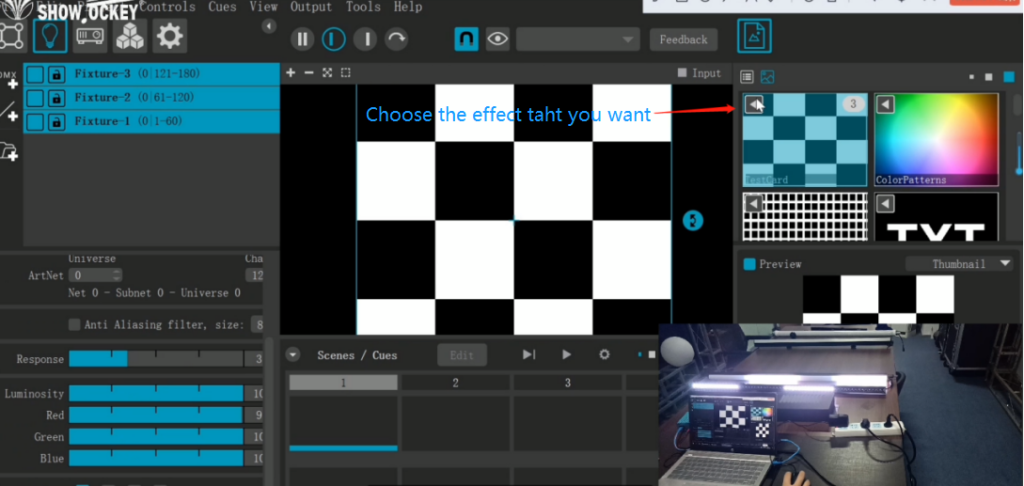
Where the red box passes through is the color of the light, and the size of the box can be freely adjusted.
7. Open the fixture Editor and write the actual pixels of the DMX tube then choose your Pixel type
8 Choose the effect that you want
Our knowledge base contains lot of written tech articles that will give you answers and help you get the most out of your gear. Our pro DMX lighting engineer and gear experts update content daily to keep you informed and on your way. Best of all, it’s totally FREE, and it’s just another reason that you get more at www.showjockey.com


